Spacing Stephanie Golden Camellia for Hedges and Borders
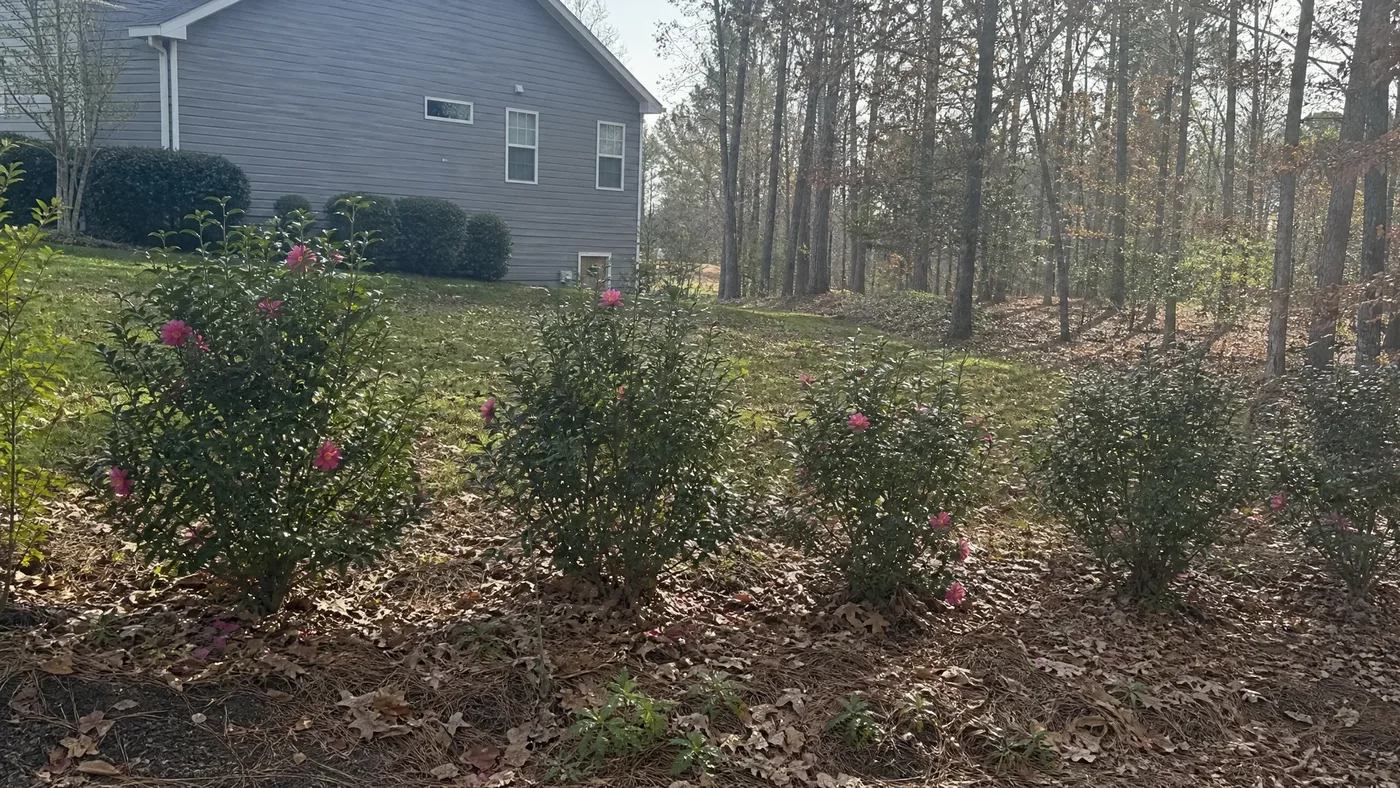
Most people plant a Stephanie Golden hedge the way they would a boxwood row, three feet apart and shoulder to shoulder. A year later the leaves turn yellow, the lower branches thin out, and the buds drop. This sasanqua is a loose, open shrub. It needs room to breathe and a patch of acid soil that drains.
This guide covers everything you need to know about spacing Stephanie Golden for hedges and borders, from the quick decision on distance to marking the line, planting, early pruning and the mistakes that cause trouble later. Get it right and you have a dense, glossy evergreen screen that flowers hot pink in fall and winter. Get it wrong and you have gaps, disease or both.
How Far Apart to Space Stephanie Golden Camellia
This spacing suits anyone who wants an evergreen privacy screen or garden border and has acid, well-drained soil. Camellia sasanqua tolerates sunnier positions than most camellias, so sun or part shade both work. If your soil is alkaline or boggy, fix that before you worry about distance. Many customers also ask whether deer will browse a hedge like this, since occasional nibbling can thin a screen.
For Stephanie Golden Camellia, space plants 4 to 6 feet apart center-to-center along your hedge line. This spacing works whether you are planting a formal screen along a property line or a softer border around a planting bed.
The tighter spacing (4 feet) fills in faster and creates a denser hedge within 3 to 4 years. The wider spacing (6 feet) gives plants more room to develop their natural shape and requires less pruning early on. Choose the 4-foot spacing if your goal is a quick, formal privacy barrier. Choose the 6-foot spacing if you want fuller individual plants and do not mind waiting an extra season or two for complete fill.
Wide-angle planting (spacing plants 8 feet or more apart) is for specimen shrubs, not hedges. Do not use that approach unless you want individual plants on display, not a unified screen.
You will see advice to plant a camellia hedge 3 feet apart for a faster screen. We don't follow it. The plants fill in only a season or so sooner, then crowd each other, hold damp air in the foliage and cost you more in pruning and disease.
Why Spacing Matters for a Full Hedge
Spacing comes down to how big each plant gets and how much air it needs once the hedge closes up.
Stephanie Golden Camellia grows at a moderate pace. The species is listed at 5 to 7 feet wide, and that width is your starting point for spacing.
If you space plants too far apart, gaps stay visible for many years. If you crowd them, air circulation suffers and disease risk rises. The goal is to find the middle ground where plants touch lightly at their edges within a few seasons, creating a unified hedge without competing for light or water.
Step-by-Step Planting for Hedges
Work through these six steps in order. Marking and soil come before any digging.
Step 1: Choose Your Planting Season
Timing decides how much stress the roots take in their first months.
Plant Stephanie Golden Camellia in fall or early spring, avoiding peak summer heat. Fall is ideal in zones 7 to 9 because the cooling soil and increased rain help roots establish before winter. Early spring works well in colder parts of zone 7 or if you missed the fall window. Wait until soil is workable and air temps have cooled before planting in late summer.
Step 2: Mark Your Spacing
Mark the whole line before you dig anything, because it is easy to move a stake and hard to move a shrub.
Measure and mark your hedge line on the ground. Use a string pulled tight between two stakes, or lay out a garden hose to define a curved line. Mark plant positions along this line at 4-foot or 6-foot intervals. Use flour, garden paint, or wooden stakes to mark each spot. Step back and look at the line. It should feel balanced and follow the contour or boundary you want.
Step 3: Test and Amend Your Soil
Soil is where we see the most failures, so test it before you plant.
Stephanie Golden Camellia wants moist, well-drained, humus-rich soil with a pH of 5.5 to 6.5. Dig a test hole at one or two points along your hedge line, fill it with water and watch how fast it drains. If water sits for more than a few hours, build a raised bed, mound the planting line or choose another location.
Skip sand in clay, because it can set almost like concrete. Yellow leaves with green veins in the first year usually mean the pH is too high. Our soil and drainage guide covers the fixes in more detail.
Mix peat moss, aged bark, or compost into the top 12 inches of soil at each planting spot. In heavy clay or alkaline soil, plan to amend generously. Use a soil pH test kit to confirm acidity before planting. If your soil tests above 6.5, add sulfur or choose acid-loving plants instead.
Step 4: Dig Planting Holes
Dig wide, not deep, so roots spread into loosened soil without the plant sinking.
Dig each hole roughly the same depth as the root ball and 1.5 times wider. Remove any compacted soil from the bottom so roots can penetrate. If you are planting multiple shrubs, dig all holes before removing plants from their pots. This keeps roots from drying out while you work.
Step 5: Plant and Water Thoroughly
This is the step where depth mistakes happen, so check the level of each root ball.
Remove each Stephanie Golden Camellia from its container and loosen the root ball gently with your fingers. Place it in the hole so the top of the root ball sits level with the ground. Backfill with amended soil, pressing gently to remove air pockets. Do not mound soil up around the stem or bury it deeper than it was growing in the pot.
Water each newly planted shrub deeply and slowly until soil is saturated 6 to 8 inches down. Repeat watering every 2 to 3 days for the first two weeks.
Step 6: Mulch and Space Evenly
Mulch finishes the job and gives you a last look at the layout.
Spread 2 to 3 inches of mulch (shredded bark, aged wood chips, or pine needles) around each plant, staying 4 inches away from the stem. Mulch keeps soil moisture even and moderates temperature as roots establish. Step back once all plants are mulched and look down the line to confirm spacing looks balanced. Small adjustments now prevent awkward gaps later.
Caring for Your Hedge While It Fills In
Most losses happen in the first two years. Customers usually ask us whether fall planting means they can skip watering, and the answer is no. See our guides on watering and pruning for more.
Water regularly and evenly for the first 1 to 2 years. Stephanie Golden Camellia needs consistent moisture while roots are establishing. Aim for 1 inch of water per week from rain or irrigation. In dry spells, water every 3 to 4 days rather than once a week in a heavy dose.
Light pruning in the second year helps shape your hedge. Prune lightly right after flowering finishes (late winter or early spring) to encourage branching and a compact form. Avoid heavy pruning or pruning in summer and fall, as you will cut off the flower buds that set the following season.
By year 3, most hedges begin to knit together. Individual plants start to touch, and the line reads as a unified screen. At this point, you can prune more deliberately to maintain the height and width you want.
Common Spacing Mistakes to Avoid
When a customer calls about a struggling hedge, we work backward through the same short list. Yellow leaves almost always trace to high pH or wet roots, and bud drop to dry spells. Check your hedge against these six mistakes.
Spacing Too Close: Planting closer than 4 feet apart creates crowding. Poor air circulation invites fungal disease, and roots compete for water and nutrients. Dense planting also makes pruning and maintenance harder.
Spacing Too Far Apart: More than 6 feet apart means your hedge will not fill in tightly for 5 to 7 years, if at all. Large gaps remain visible through the winter when the deciduous plants around it are bare.
Uneven Spacing: Irregular intervals create visual gaps and make one section of hedge look fuller than another. Take time to measure and mark before planting.
Planting in Poor Drainage: Stephanie Golden Camellia does not tolerate waterlogged soil. Planting in a boggy spot, even with perfect spacing, leads to root rot and failure. Improve drainage or relocate.
Planting Too Deep: Burying the root collar or stem under soil causes rot and disease. Keep the soil line level with the top of the root ball.
Neglecting Water During Establishment: The first 1 to 2 years are critical. Inconsistent water stress causes flower bud drop and weak growth. Do not assume that fall or spring planting means zero watering.
Expected Results and Timeline
This is what to expect from a hedge planted at the spacing above, year by year.
At planting, you have young shrubs, often in 1-gallon or 3-gallon containers, spaced cleanly along your line. The first season is about root establishment. You will see modest top growth, and the hedge will still look scattered.
By year 2, the spacing gap narrows visibly. Plants begin to overlap slightly at the edges. Light pruning encourages bushy branching and fills in thinner spots. Flower production ramps up, and you may see the first full flush of pink blooms in fall and early winter.
By year 3 to 4, the hedge reads as a unified screen. Individual plant boundaries blur. The line is full and dense enough for privacy. Maintenance shifts from waiting for fill-in to routine shaping and pruning. Sources list the species at 6 to 10 feet tall and 5 to 7 feet wide, though it can reach 14 feet, so plan your pruning to hold the size you want. Our guide on how big Stephanie Golden really gets goes into this.
Plants keep filling out for close to a decade. With basic care, a well-spaced hedge is a long-term planting that will outlast most fences.
Quick Reference: Spacing Checklist
Use this table as a checklist while you plan and plant your hedge.
| Task | Spacing / Timing / Details |
|---|---|
| Hedge spacing (center-to-center) | 4 to 6 feet apart |
| Planting season | Fall or early spring, avoid peak summer heat |
| Soil pH | 5.5 to 6.5 (acidic), test before planting |
| Soil type | Well-drained and humus-rich, amend heavy clay |
| Mulch depth | 2 to 3 inches, keep 4 inches away from stem |
| Establishment watering | First 1 to 2 years: 1 inch per week, every 3 to 4 days in dry spells |
| First pruning | Late winter or early spring of year 2, light shaping only |
| Time to visual fullness | 3 to 4 years (4-ft spacing) or 4 to 5 years (6-ft spacing) |
| Mature height/width | 6 to 10 feet tall, 5 to 7 feet wide |
| Full maturity | About a decade |
| Zones suited | Species hardy in zones 7a to 9b (no cultivar rating listed) |
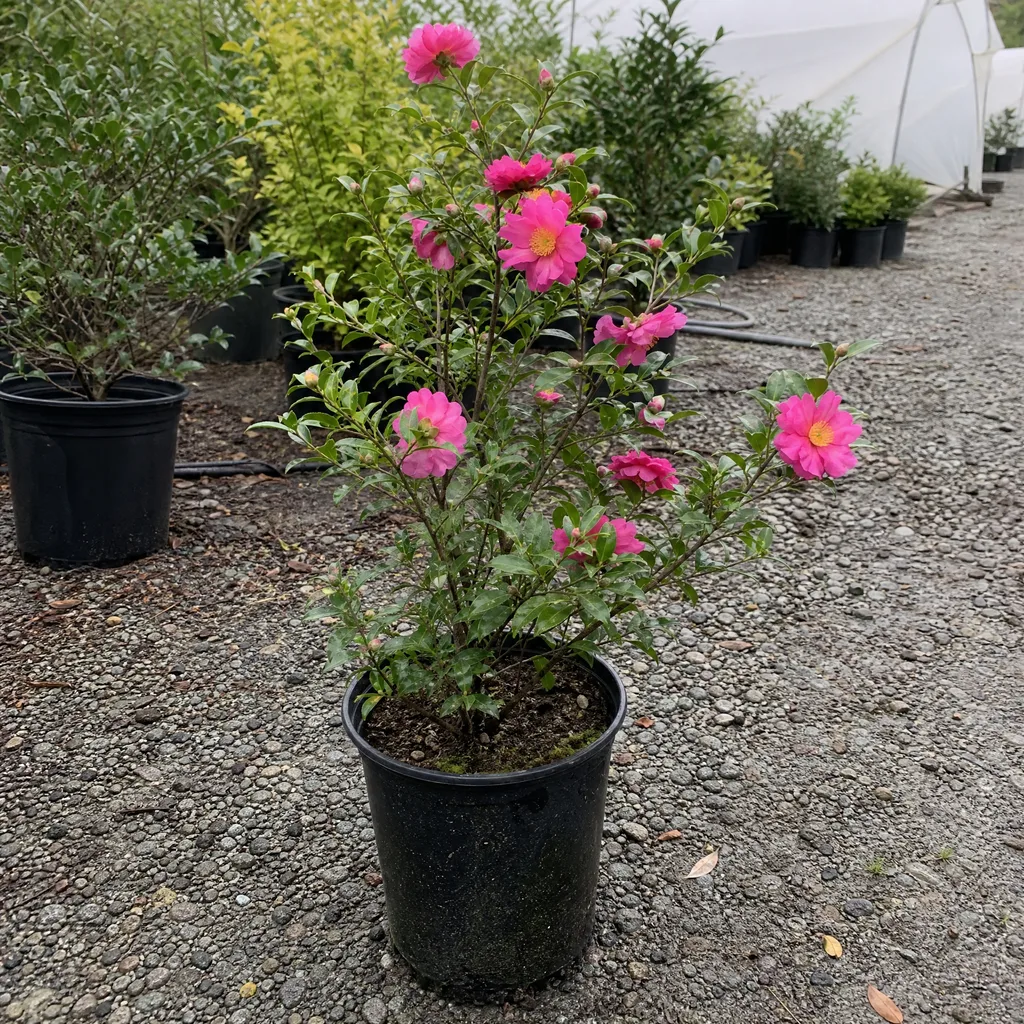
| Bloom season | Fall into winter, hot pink semi-double flowers with yellow anthers |
For a complete look at year-round care, watering, pruning, and troubleshooting, visit the Stephanie Golden Camellia care guide.
Spacing Stephanie Golden for a Hedge That Fills In Right
Space Stephanie Golden 4 to 6 feet apart, center to center, in acid, well-drained soil. Choose 4 feet for speed and 6 feet for fuller plants, resist the 3-foot shortcut, and water steadily through the first two years.
Stephanie Golden Camellia
Nursery-grown Stephanie Golden Camellia in sizes from 2.5 Quart, shipped to your door.
From $37.93
Shop Now →Customers come back to us for Stephanie Golden because a hedge planted this way fills in and flowers when little else in the garden does, and as a small business of growers with our own farms, we only sell top-quality shrubs we would plant ourselves.