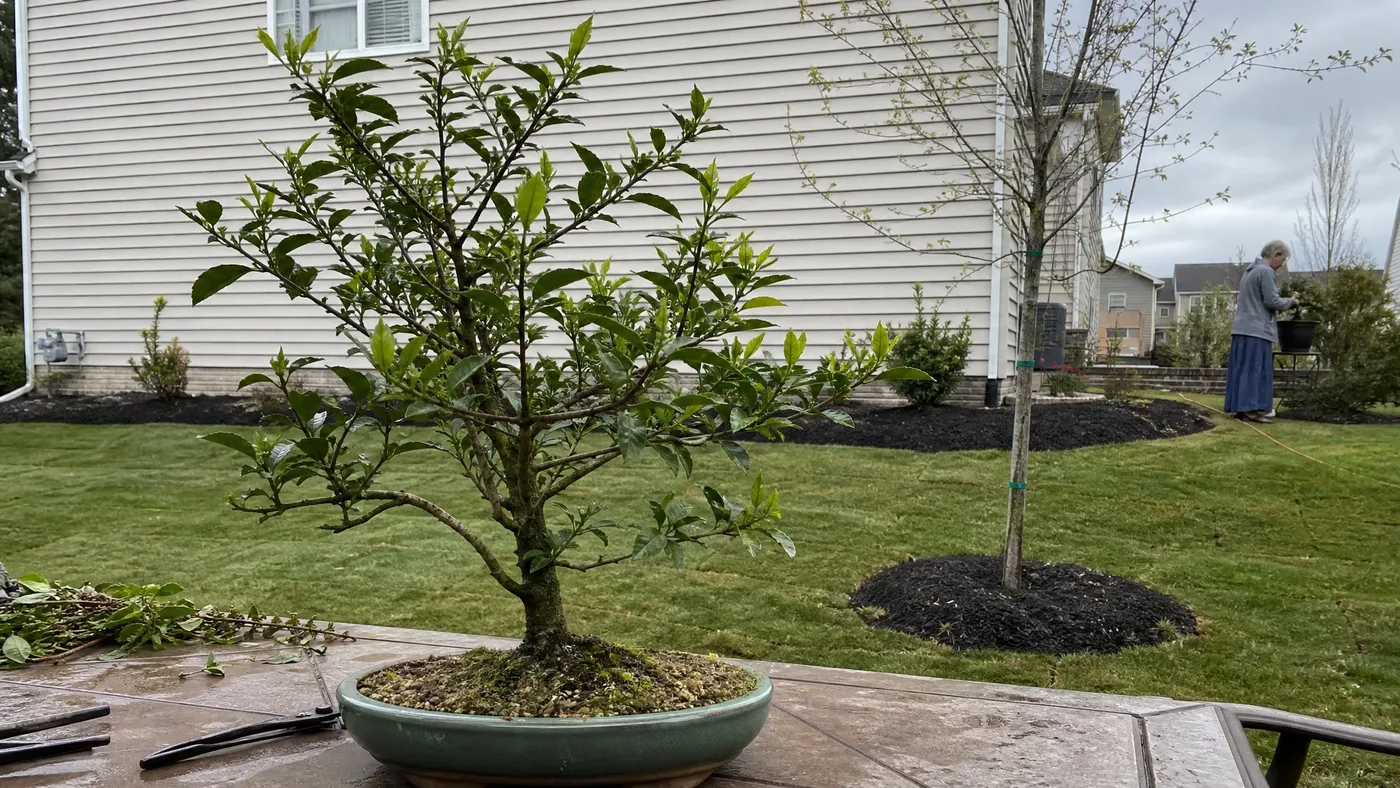
Growing Stephanie Golden Camellia as a Bonsai
On a hillside, a thicket of sasanqua shrubs holds the slope in tangled layers. Small birds shelter in the dense leaves, and insects work the open flowers in the cool of autumn. Now picture that whole habit shrunk into a single tray, with the same dark leaves and the same fall bloom.
Done badly, a sasanqua bonsai ends in yellow leaves, dropped buds and a rotted root ball. Done well, it gives you a small tree that flowers just as the rest of the garden winds down.
Read on for the choices in the order you will face them: the plant, the starter material, the pot, the soil, the pruning calendar, wiring, and winter protection for a shallow pot.
Why Small-Leaved Sasanquas Suit Bonsai
Walk the edge of a sasanqua thicket and the leaves are the first thing you notice: dark, glossy and small, packed along thin twigs. Sasanqua leaves are usually darker green and smaller than those of japonica or reticulata camellias, and they run about 2 inches long. That scale lets a short trunk read as a full-size tree.
The woodland habit helps too. A sasanqua is a shrub of dappled light and soil rich in organic matter, so a pot of acid, organic mix is not far from what it wants. It also grows faster than japonica camellias, so you see trunk and branch structure sooner.
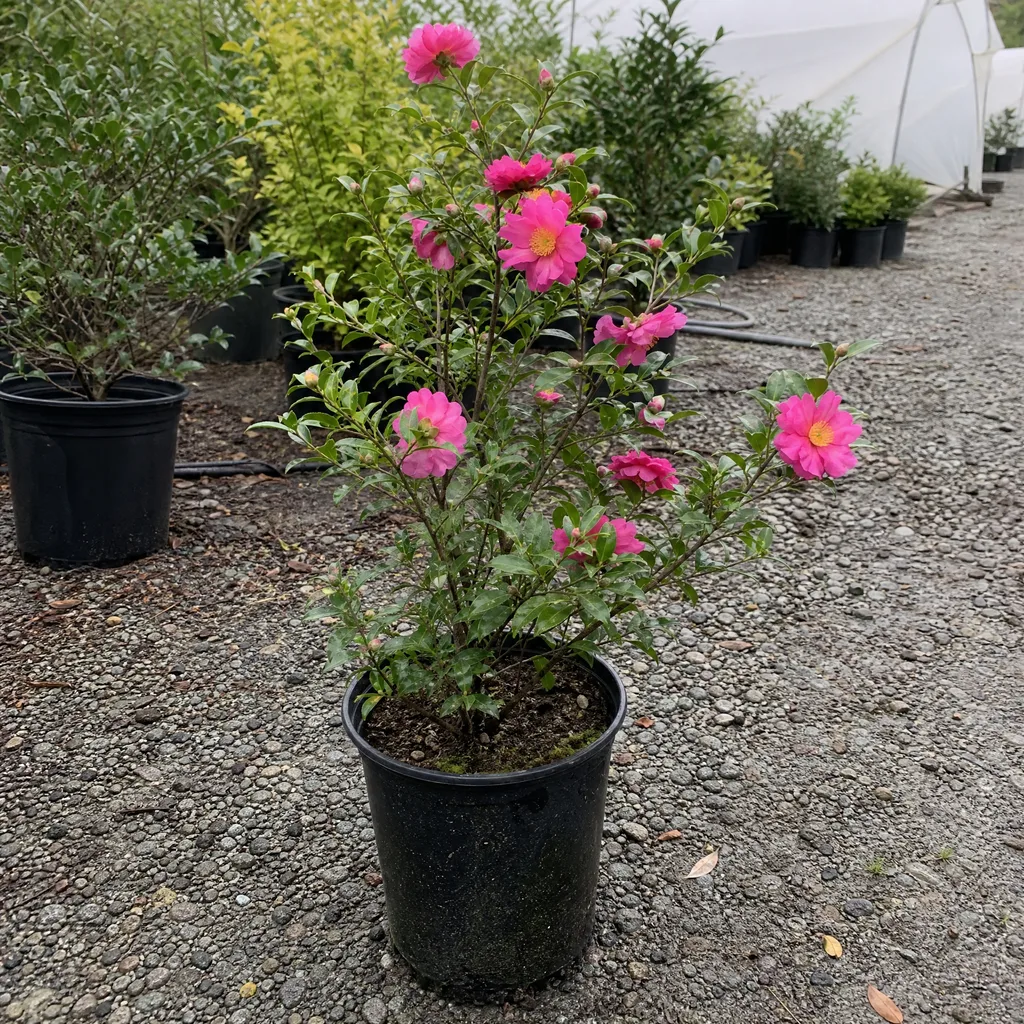
Stephanie Golden adds its own traits. It is upright, dense and vigorous, with hot pink semi-double flowers and bright yellow stamens. Vigor builds a trunk quickly but means regular cutting back. A 2-inch leaf is small for a camellia, not tiny for bonsai, so aim for a medium-size tree. Our answer: yes, it works, on those terms.
Choosing a Stephanie Golden Camellia Starter Plant
Stand in front of a row of nursery shrubs and look low. The plant you want has a thick lower stem that tapers upward and branches that start close to the soil, because those are the parts you cannot grow quickly in a pot. Check each plant against this list before you buy.
| What to check | Good sign | Walk away if |
|---|---|---|
| Trunk base | Thick, tapering, with low side branches | Tall and bare, with branches only at the top |
| Leaves | Glossy, dark green, evenly colored | Pale between the veins or spotted |
| Roots at the surface | Spread out from the trunk in all directions | Circling hard around the stem |
| Leaf undersides | Clean | Bumpy or sticky with scale |
Scale is the pest to look for first, since it can be a troublesome insect on sasanqua. A cutting is the other route. It gives you roots shaped from the start, but you wait years for any trunk worth styling. Our guide to rooting cuttings covers that.
What we tell customers is to start with a nursery shrub and root cuttings later as a second tree. We grow Stephanie Golden in nursery containers for exactly this kind of project. Expect to lose some flowers in the first year or two while you cut it down to a bonsai frame.
Picking a Shallow Pot and Its Placement
Lift a camellia out of its nursery pot and the roots sit in the top layer of the mix, running sideways. The Clemson factsheet says it plainly: camellias are shallow-rooted. That is good news for bonsai, because a wide, low pot suits the way this plant already roots.
Choose a plain pot that is wide, only moderately deep, and has large drainage holes. Go a little deeper than you would for a pine, since this tree is evergreen and carries a heavy bloom. Poor drainage invites Phytophthora root rot, so a pot with small or blocked holes is the wrong pot, however handsome. Our container growing guide covers the same drainage logic for larger pots.
For placement, sasanquas tolerate more sun than most camellias, but they do best protected from harsh afternoon sun. A shallow pot adds a problem, because thin walls heat up and dry the roots fast. Set the tree where it gets morning light and filtered shade after noon, out of winter wind.
Our pick: a wide, medium-depth pot with big drainage holes, on a bench in morning sun and afternoon shade.
Mixing an Acid Bonsai Soil
One of the most common questions we get is why the new leaves on a potted camellia turn pale while the veins stay green. Most often the mix has drifted out of the acid range. The University of Florida puts the target at pH between 5.0 and 6.5, and a bonsai pot holds so little soil that it drifts quickly.
Camellias do best in fast draining, slightly acidic soils with high organic matter content. Those two needs pull against each other in a small pot, so the recipe has to balance them.
The Recipe We Settle On
Build the mix mostly from coarse, gritty particles such as sharp sand or lava rock, with a generous share of composted pine bark and a smaller share of leaf mold or peat to hold moisture. Avoid crushed limestone or anything that raises pH. Water should run out of the bottom almost as fast as you pour it.
Reading the Leaves
Check the tree against these two signs:
- Pale new leaves with green veins mean the pH is too high, so retest the mix and check your water source.
- Wilting despite wet soil, or leaf drop after a rainy spell, points to roots sitting in water, so open up the mix with more grit.
Choose the bark, grit and leaf mold mix, with grit as the largest part.
Timing Pruning Around the Fall Bloom
Look closely at a branch in late summer and you will see the flower buds already forming at the tips. That is the reason timing matters here. Sasanquas bloom first, from October to December, while japonicas follow from December to March, so a calendar written for a japonica bonsai puts the cuts in the wrong place.
Next year's blossoms form on old growth, and pruning in late summer or fall removes flower buds. Some bonsai advice tells you to cut and pinch in late summer to build fine branching. Skip that with this tree, because you will pay for it in lost flowers. Our pruning guide goes further on structure.
| When | What to do | Why |
|---|---|---|
| While in bloom | Remove only dead twigs | The buds are open or about to open |
| Just after the last flower | Do the main shaping cuts | The tree has the whole growing season to rebuild |
| Spring and early summer | Pinch new shoots back lightly | This keeps branches short and leaves small |
| Late summer to fall | Do not cut | New buds are forming |
The schedule we choose: all structural pruning right after the last flower falls, light pinching until early summer, and nothing after that.
Wiring Stephanie Golden Camellia Branches Gently
Bend a camellia branch a little too far and it cracks with a sharp snap. The bark is thin, and a tight wire leaves a scar that stays for years. Because Stephanie Golden is vigorous, branches also thicken quickly, so wire that fit well in spring can bite by midsummer.
Wire right after the post-bloom pruning, when the branch structure is open and you can see what you are doing. Follow these steps:
- Choose the thinnest aluminum wire that will hold the branch in place.
- Wrap it at a gentle slant, snug against the bark but not tight.
- Support the branch with your thumbs at the bend and move it slowly, a little at a time.
- Check often through the growing season and remove the wire before it presses into the bark.
- Stop wiring by late summer, since flower buds sit at the shoot tips and are brittle.
For thicker limbs, use a guy wire anchored to the pot rather than forcing a bend. Our approach: wire young branches soon after pruning, guy the thick ones, and take every wire off early.
Protecting Stephanie Golden Camellia Roots in Winter
In a sasanqua thicket, fallen leaves blanket the ground, and the roots sit under that litter. A bonsai pot has no such blanket. Its thin walls expose the roots to cold on every side, which is a bigger risk than the cold on the branches.
The species is listed as hardy in zones 7a through 9b, and the cultivar's own hardiness is not published. Treat a pot as colder than the ground in your zone. Our zone guide explains the ranges, and your extension service can tell you what temperature is a risk.
Shelter the Pot, Not Just the Tree
Sink the pot into the ground or a bed of bark mulch up to the rim, or pack mulch around it against a sheltered wall. Group pots together to share warmth. The plant appreciates shelter from winter winds and cold, and once the flowers finish it is the roots that need your attention.
In a severe freeze, move the pot into an unheated garage or porch, but only for those days. Keep it bright and keep watering lightly, since an evergreen still loses water. The method we choose: a mulch-buried pot against a sheltered wall, moved in only for hard freezes.
Your Stephanie Golden Camellia Bonsai Over the Years
Each early choice shows up later. A low-branched starter plant gives you a trunk with taper. The gritty acid mix keeps the leaves dark green. Cutting after the flowers means fall flowering between September and December arrives on schedule. Feed lightly, following our fertilizing guide, and check leaf undersides for scale, aphids and vine weevil damage as the tree ages.
Picture the finished tree on its bench in autumn, a small shrub covered in hot pink flowers with yellow stamens, while out on the hillside the same species drops its blooms on the ground below. As the roots fill the pot over the next few years, revisit the pot size and refresh the mix.
Stephanie Golden Camellia
Nursery-grown Stephanie Golden Camellia in sizes from 2.5 Quart, shipped to your door.
From $37.93
Shop Now →Our Stephanie Golden camellias grow in acidic, free-draining beds with a little shade through the hottest part of the afternoon. Everything we sell is raised on our own farms, where we grow top-quality shrubs we would happily plant ourselves. When you are ready to begin your own camellia bonsai, a young Stephanie Golden from our shop makes a fine first tree to shape.