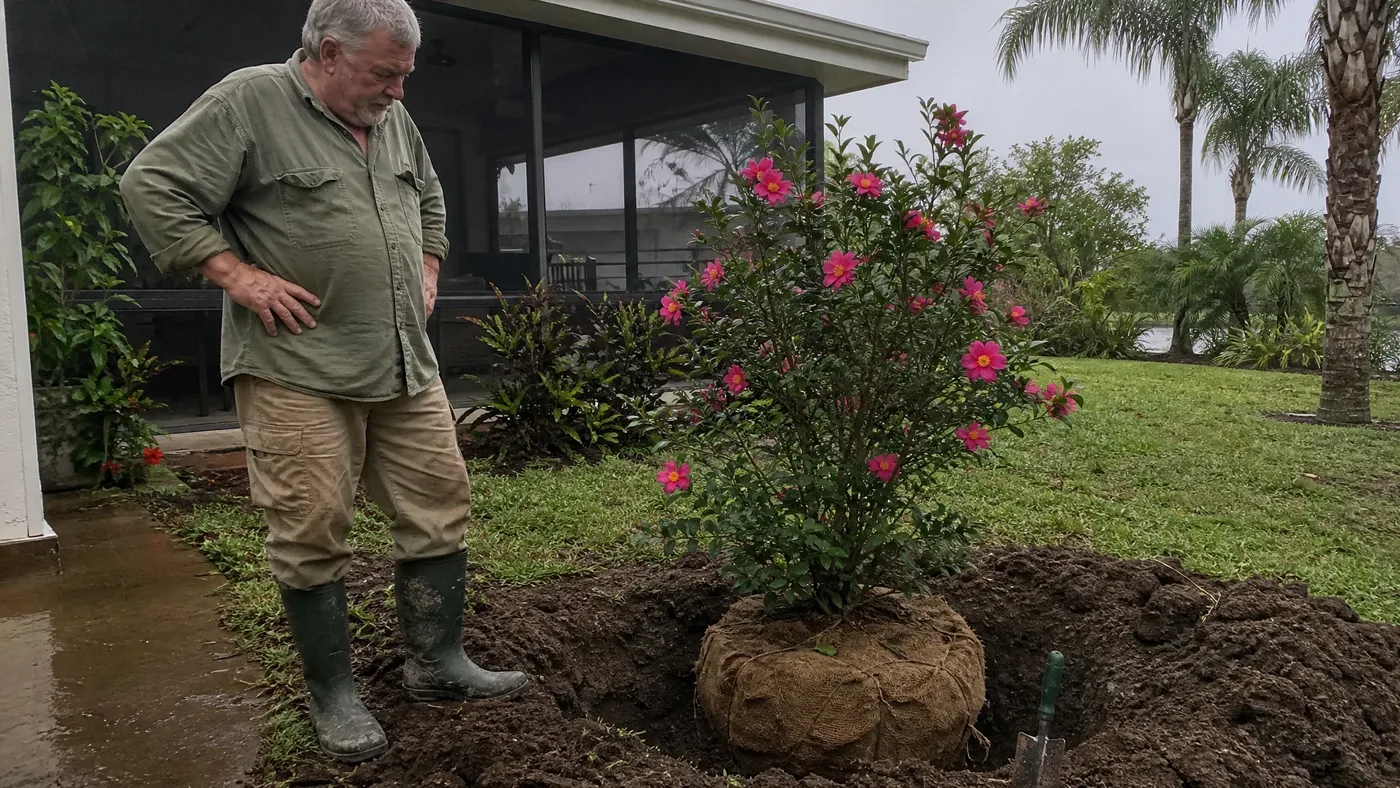
How to Transplant an Established Stephanie Golden Camellia
Late on a winter afternoon, the shadow line from the garage slides across your bed and stops just short of your Stephanie Golden camellia, leaving it standing in the last hard sun of the day. Or maybe the line swallows the plant whole and it never sees the light it needs. Either way, you have watched long enough to know the plant belongs somewhere kinder.
A move done well costs a camellia one quiet season, while a move done badly, with a cracked root ball, a deep hole or soggy soil, can cost you the plant. Read on for the right dormant window, how to mark and size the root ball, how to lift and carry it, how to test the light at the new site, setting depth, and watering through the first winter.
Picking the Dormant Week to Move Stephanie Golden Camellia
Sasanquas flower in fall, typically between September and December, so a Stephanie Golden is carrying buds or open hot pink blooms in the months when most shrub advice says to dig. Common advice names fall the universal moving season, but for this camellia it is the wrong one. A plant in flower is spending stored energy on petals, and a trimmed root system cannot keep up, so buds drop.
Your window runs from the last fallen petal to the first push of spring growth. Extension guidance for camellias runs from November to February, and since this cultivar finishes earlier than a winter-blooming japonica, the window opens sooner for you. In the colder end of zones 7–9, aim for late winter after the hardest freezes. In the warmer end, midwinter works well. Your local extension office can give you average freeze dates for your county.
Choose the Week Itself
Pick a mild, overcast stretch when the soil is moist but neither frozen nor soggy, with no hard freeze in the forecast for several days afterward. Moist soil holds together around the roots, and cloud keeps the exposed ball from drying while you work. One of the most common questions we get is whether a camellia in bud can be moved if the ground is workable. We tell customers to wait.
Root Prune a Season Ahead If You Can
If you have the patience, cut the roots months before the move. Clemson's guidance is that spring moves are root pruned the previous October, which lets the plant grow fresh feeding roots inside the future ball. For a late-winter move, that means making the cuts described below the autumn before. A plant that has already rebuilt its roots rarely notices the move.
Marking the Root Zone Around Stephanie Golden Camellia
Before a shovel touches the ground, stand back at the edge of the plant and read it. North Carolina State's plant database gives the species a spread of 5–7 feet, and a camellia that has sat in one bed for years usually fills its width. The canopy edge shows how far the plant has spread above ground and is a rough guide to how far its fine roots have gone. Our size guide covers how wide your plant is likely to get if you want to plan the new spot around it.
Draw the Circle
Drive a stake at the trunk, tie a string to it, and walk the string around the plant at the distance you will use for the ball. Mark the line with flour or marking paint. The canopy circle is for reading the plant and the ball circle is for digging, and the ball circle will be much smaller. Seeing both on the ground keeps you from starting a cut too close or too far out.
Tie a Ribbon on the Sun Side
Tie a ribbon to a branch on the side that now faces the strongest afternoon sun, and note the compass direction. The leaves on that side have hardened off to the glare, and turning them back toward the same direction in the new hole is the easiest way to avoid scorch. Photograph the plant from that side as well.
While you are marking, read the leaves. Yellowing between the veins can point to soil that has drifted out of the acid range or to wet feet, and scale is a troublesome pest on sasanquas, so check stems and leaf undersides. Treat what you find before the move, because a stressed plant takes the move harder. Our soil and drainage guide explains how to tell which problem you have.
Cutting the Root Ball to Match Mature Size
Clemson's advice is that all broadleaf evergreens, camellias included, should be moved with the soil attached, never bare root, and that the ball must be large enough in diameter and depth to hold the fibrous feeding roots. For diameter, University of Georgia Extension gives a rule of at least 18 inches, or 12 inches of ball for every inch of trunk diameter. Measure the trunk about 6 inches above the ground, and use the thickest stem on a multi-stemmed plant.
| Trunk Diameter | Minimum Ball Diameter |
|---|---|
| 1 inch | 18 inches (the minimum applies) |
| 2 inches | 24 inches |
| 3 inches | 36 inches |
| 4 inches | 48 inches |
Sasanquas grow faster than japonicas, and the species can reach 14 feet, so a plant that has been in the ground a few years may have a heavier trunk than you expect. A ball that size can weigh far more than two people can lift. If the table gives you a number you cannot carry, hire a nursery crew for the lift rather than shrinking the ball.
Make the Cuts
Use a sharp, flat spade and cut straight down along the ball circle, working all the way around. Sever thick roots with loppers, because clean cuts heal faster than torn ones. Then dig a trench just outside the line and undercut the ball at an angle so it narrows toward the bottom like a shallow bowl. Never pry on the trunk.
Some advice says to cut the top back hard to balance the lost roots. We leave the canopy alone except for broken branches and do the shaping right after flowering the following year. The plant needs its leaves.
Lifting the Plant Without Breaking the Ball
Water the plant well the day before, because the organic, acidic soil camellias like turns crumbly when dry. Once the ball is undercut, tilt it gently to one side, push a length of natural burlap underneath, then tilt it back the other way and pull the cloth through. Draw the burlap up around the ball, pin it at the top, and lash it snugly with twine. The ball is only as strong as its wrapping.
Carry It Level
Never lift by the trunk, since that is how a ball separates from its roots. Slide a tarp or a board under the wrapped ball and let two people carry it by the edges, keeping it level.
- If the soil begins to crack as you lift, stop and add a second wrap of burlap before moving on.
- Keep the ball upright and out of wind and sun, because an exposed ball dries out surprisingly fast in winter air.
- If you must drive it across town, set the ball against the truck bed's front wall so it cannot roll.
- Replant the same day. A ball that waits overnight is a ball that loses fine roots.
Short trip, short wait, and a firm wrap are what keep the roots intact.
Digging a Hole in Better Light at the New Spot
Dig the new hole before the plant leaves its old one. Make it wider than the ball and slightly shallower, so the ball sits on firm, undisturbed soil. Camellias want acid soil, roughly pH 5.5 to 6.5, that stays moist but drains freely. Fill the hole with water and watch it. If it is still standing after a long while, choose another spot, because the root rot disease that attacks camellias is favored by poor drainage and standing water.
Watch How the Light Falls
This is where the shadow line from the start earns its keep. Visit the site in the morning, at midday and again late in the afternoon. Sasanquas tolerate far more sun than most camellias, but they do best out of harsh afternoon glare, so the ideal spot gets bright morning light and filtered or shifting shade after lunch. Our sun and shade guide walks through this in more detail.
Remember that a winter shadow is longer than a summer one, and a deciduous tree that shades the site in July may be bare now. Judge the spot as it will look in the hottest months. In the warmer parts of the range, lean toward more shade.
If the old spot needs something new in it once the camellia is gone, we grow Stephanie Golden for exactly that kind of gap.
Setting Stephanie Golden Camellia Level and Backfilling
Camellias cannot tolerate deep planting. University of Florida extension says the root ball should sit 1–2 inches above the soil line to allow for sinking. In our rows, the plants that struggle after a move are almost always the ones set too low. A buried trunk base stays wet, the bark rots, and the first sign is yellowing leaves and a slow decline that looks like drought.
Set the Height and Direction
Slide the ball into the hole on its tarp, then turn it until the ribbon faces the same compass direction as before. Lay a stick across the hole to check that the top of the ball stands above the surrounding grade. Adjust by lifting the tarp and adding or removing soil underneath, never by stamping on the ball.
Fill and Firm
Once the plant is standing straight and at the right height, fill in around it in stages.
- Cut the twine and pull the burlap back from the top and sides of the ball. If it is synthetic, remove it completely.
- Mix the soil you dug out with some organic matter. Camellias do best in soil high in it.
- Add the soil in layers, firming each one with your hands to push out air pockets.
- Stop at the top of the ball. Do not pile soil over its shoulders.
- Shape a low ring of soil just outside the ball to hold water during the first soak.
Watering in Through the First Winter
Water slowly right after backfilling so the soil settles around the ball. After that, keep constant moisture in the ball without saturating it. Camellias are sensitive to overwatering and succumb to root rot when kept too wet, so push a finger into the soil beside the ball before each watering. Evergreen leaves keep losing water to cold wind even when the roots are slow, so check in January, too. Our watering guide covers the routine in more depth.
Spread mulch 2–3 inches deep over the surrounding soil, but keep it off the ball so air can reach it. Hold off on fertilizer until you see new growth in spring.
| What You See | Likely Cause | What To Do |
|---|---|---|
| Leaves curl and droop, soil is dry | Ball has dried out | Water slowly and deeply, then recheck in a few days |
| Leaves yellow and soften, soil is soggy | Too much water or poor drainage | Stop watering and check the hole's drainage |
| Brown, scorched edges on one side | Wind or afternoon sun | Add a screen on that side |
Give It Winter Shade
Set two stakes on the sunny, windy side and stretch burlap between them, a hand's width off the leaves. This softens the glare and the drying wind while the roots rebuild. Take it down in spring once new growth has hardened. For hard-freeze nights, see our winter care guide.
Stephanie Golden Camellia Once the Move Is Done
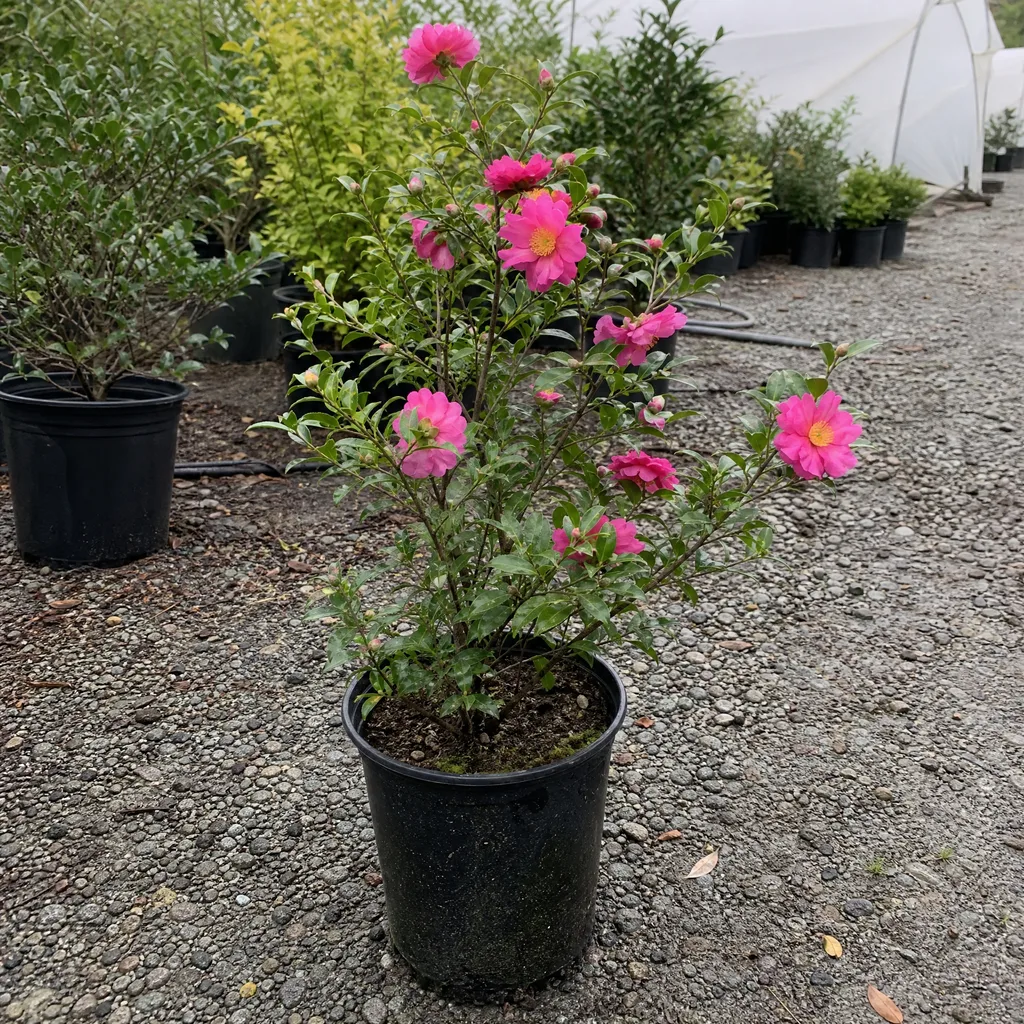
A settled plant has glossy, dark green leaves that stay firm through winter, a ball that stays evenly moist, and a flush of new growth in spring. Expect a lighter bloom the first fall, since the plant is putting its energy into roots. Hot pink, semidouble flowers with yellow stamens should return in full over the seasons that follow. If buds are few, check the light, the height and the moisture before you worry.
Picture it a year from now, with the late shadow line sliding across the bed and stopping short of the leaves, the plant lit rather than scorched. Come back at the next dormant season, look at the mulch, the soil level and the light once more, and adjust if needed.
Stephanie Golden Camellia
Nursery-grown Stephanie Golden Camellia in sizes from 2.5 Quart, shipped to your door.
From $37.93
Shop Now →Stephanie Golden does best in the beds where we raise it, with acidic, well-drained soil rich in organic matter and a little shade when the afternoon sun turns hot. Every plant we sell is grown on our own farms, and that includes top-quality shrubs like this camellia. Once you have a spot picked out for the move, see what is in stock now in our shop.